Approve/Reject a Workset
Once all the necessary work has been finished on all assets, users can continue to approve or reject the work there.
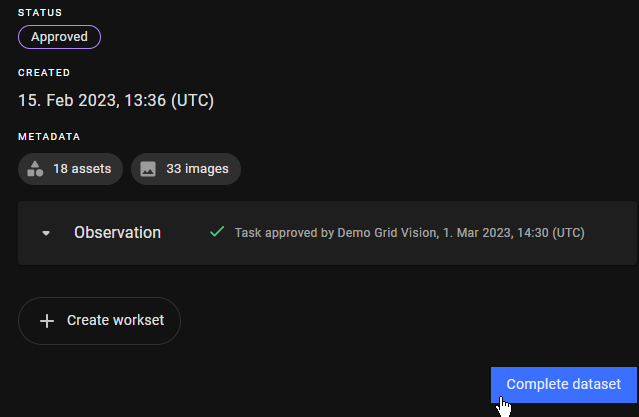
When a workset is approved, all the work is verified and approved to report. The dataset will then change to “Approved” status. Users can easily identify the accepted work by filtering for “Approved” status in the Dataset page.
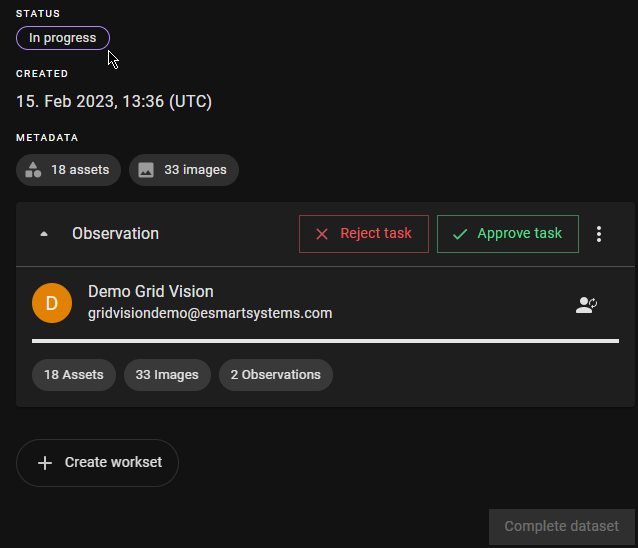
On the other hand, in a rejected workset, not all the work is accepted. The Dataset will still have the “In progress” status.
How to approve/reject a workset
- Make sure to lock all the assets by selecting “Finish” for every asset. Go back to the Dataset Detail page and see that the progress bar of the workset is filled.
- In the top right corner of the workset, click on the "Approve task" button to approve the workset. Otherwise, click on the “Reject task” button to reject it. .


- The name of the user who approved/rejected and approved/rejected date-time (UTC) are displayed.


- After all the worksets in a dataset are approved, the “Complete” button is enabled.

NB: Same process applies to Observation, Inventory, Observation and Inventory.
Remove the Approval/Rejection
To remove the approval/rejection assessment, 1. Hover over the approval/rejection message which then displays the close (x) button. 2. Click on the close (x) button.


By doing so, with the approved workset, its dataset changes back to “In Progress” status. The "Complete” button can be disabled when approval is removed in all approved worksets of the dataset.
